Picmal can add “Convert” and “Compress” options to your Finder right-click menu. Instead of opening the app and dragging files in, you right-click an image and you’re done.
Apple buries this setting in a place you’d never think to look. Here’s where to find it.
What Are macOS Services?
Services are how macOS lets apps hook into the right-click menu. Most people never touch this settings panel, which is why most people don’t know it exists.
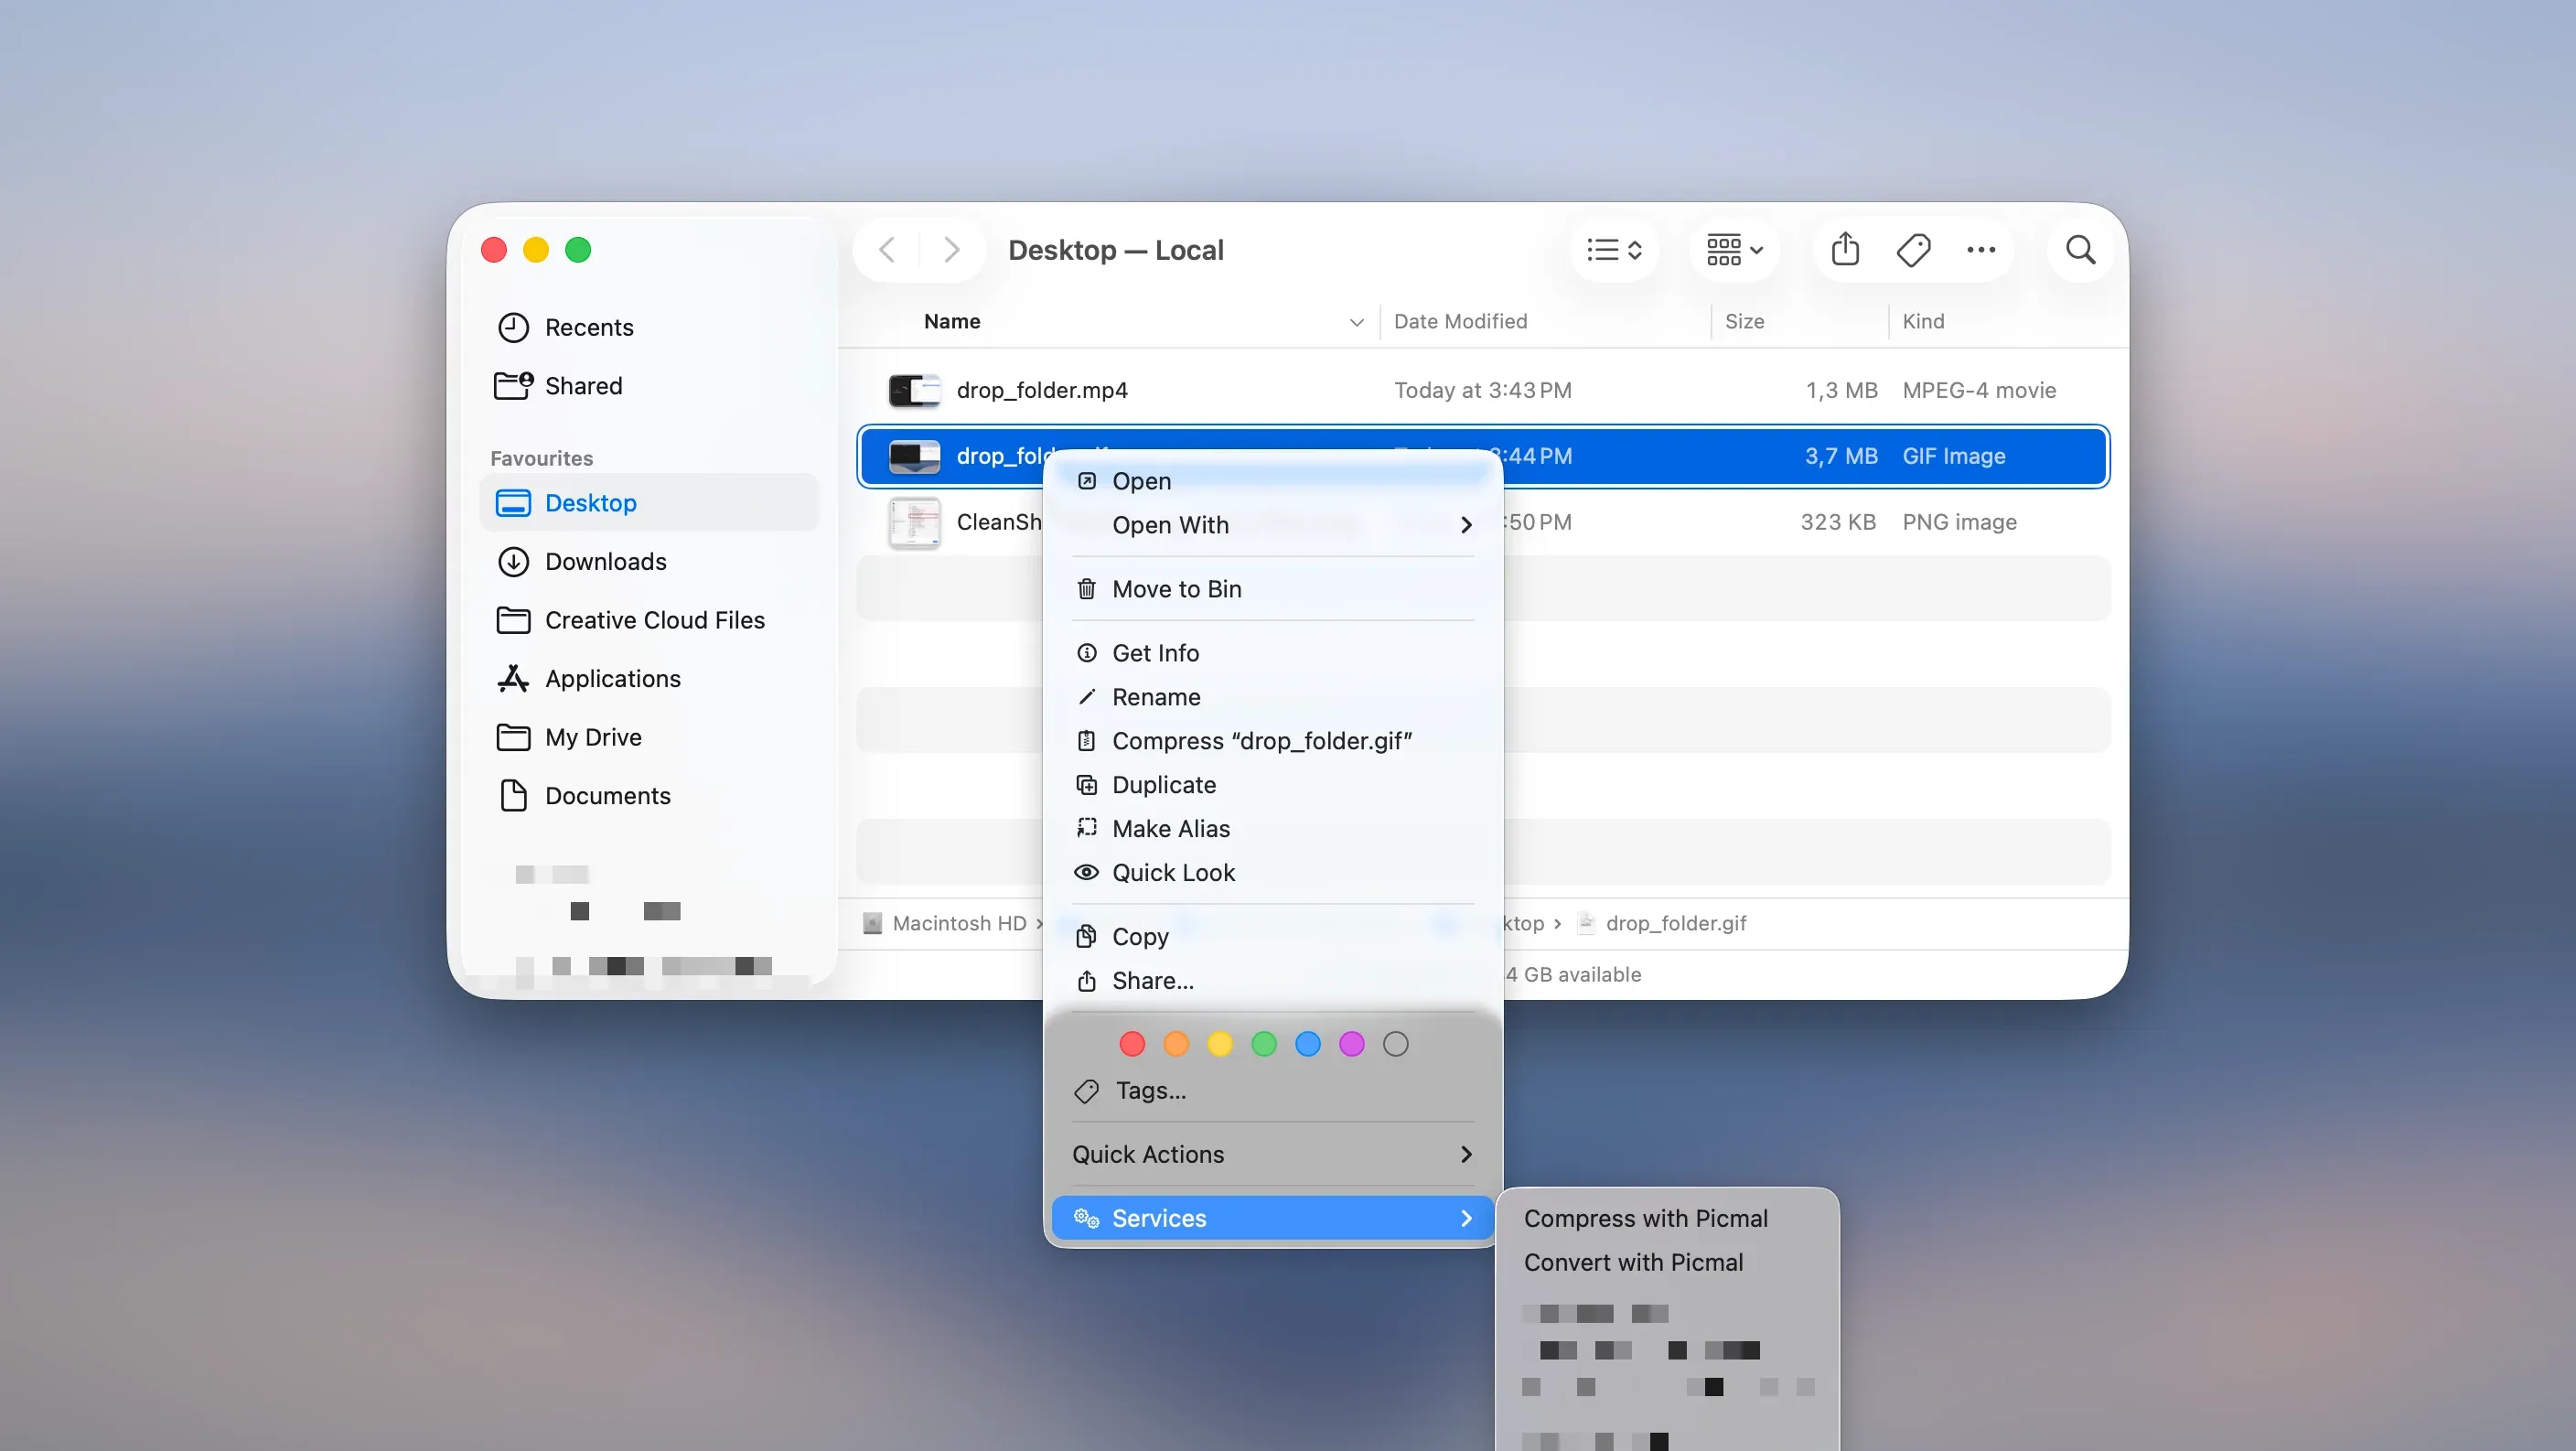
Once enabled, Picmal adds two options when you right-click image files:
- Convert with Picmal — opens your selection for format conversion
- Compress with Picmal — opens your selection for compression
Works on one file or fifty. Select them all, right-click, done.
How to Enable Picmal’s Right-Click Options
Step 1: Open System Settings
- Click the Apple menu () in the top-left corner
- Select System Settings (called System Preferences on older macOS)
Step 2: Find the Keyboard Shortcuts panel
Yes, keyboard shortcuts. Apple decided this is where right-click menu options live.
- Click Keyboard in the sidebar
- Click Keyboard Shortcuts…
- Select Services from the left panel
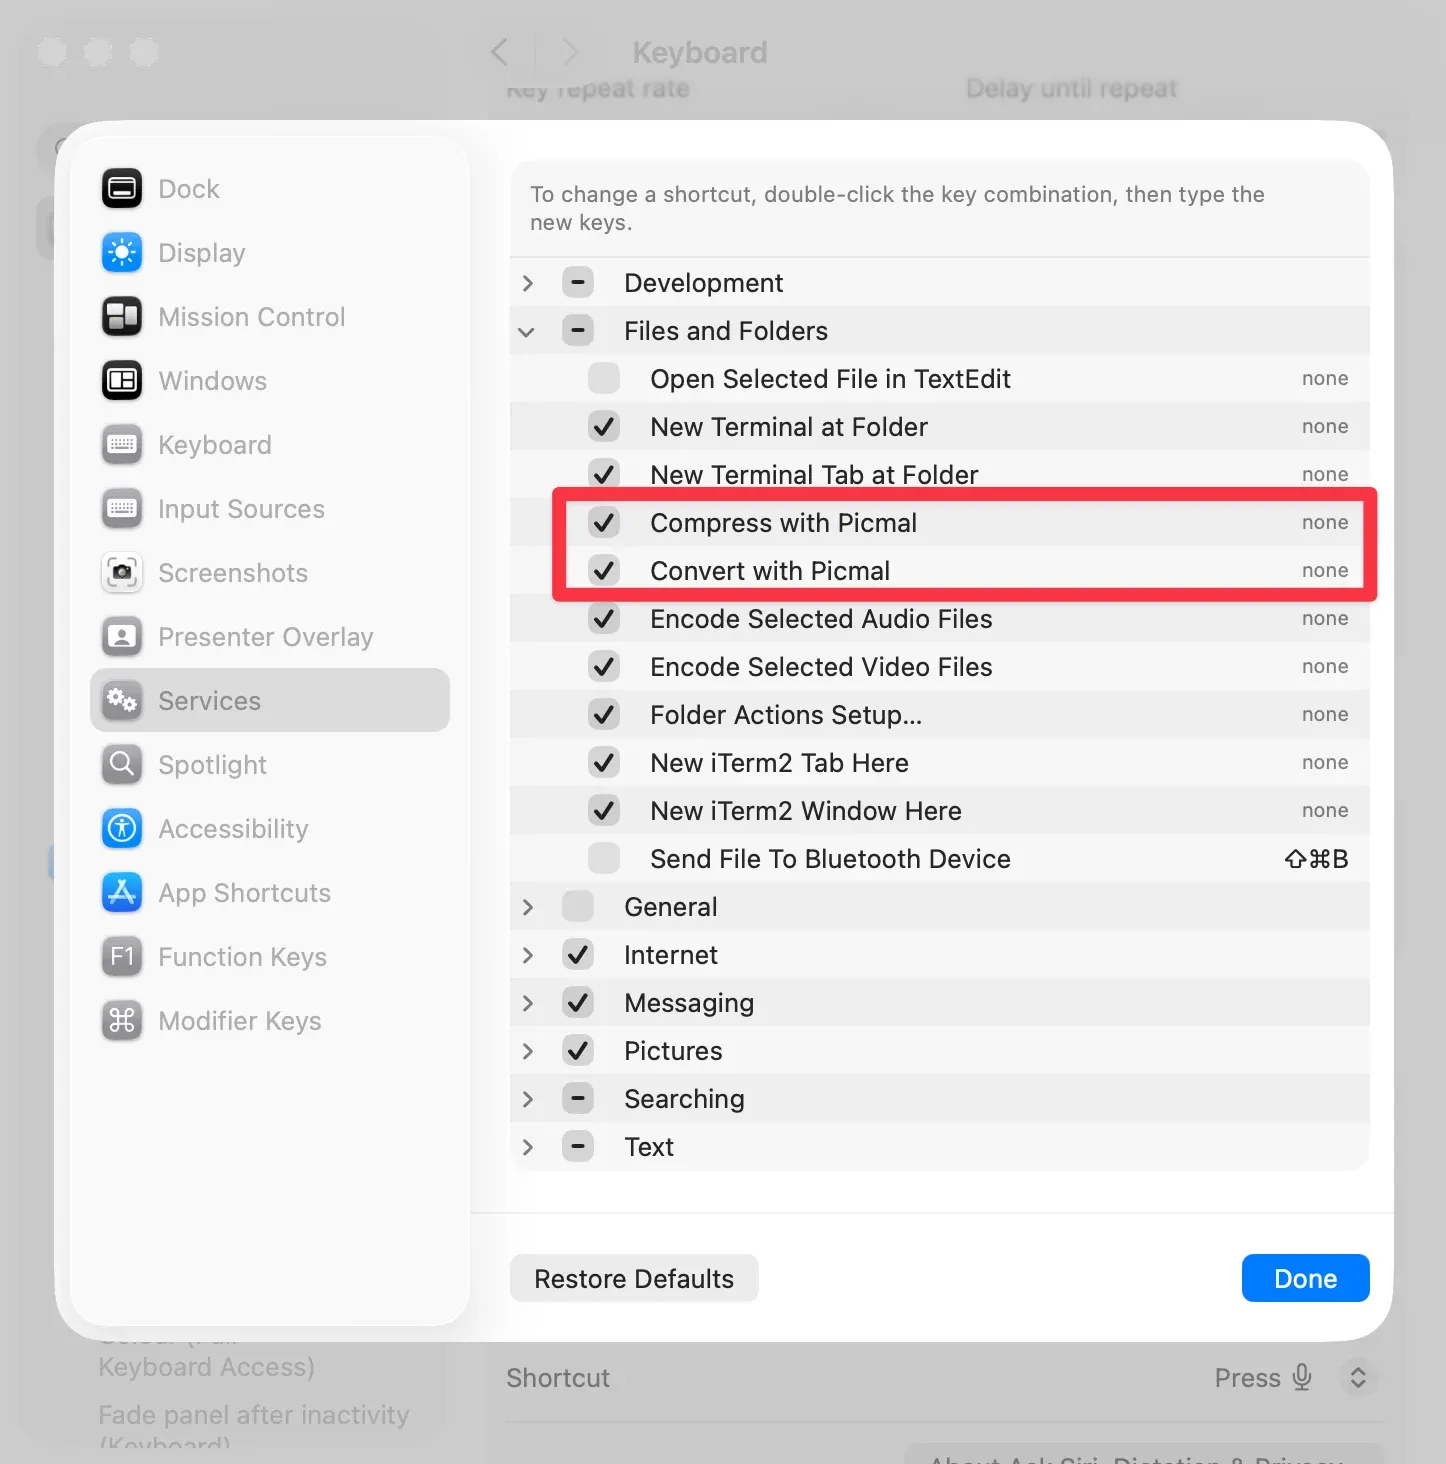
Step 3: Enable Picmal’s Services
- Scroll down to Files and Folders
- Find these two entries:
- Convert with Picmal
- Compress with Picmal
- Check the boxes next to each one
- Close System Settings
Using It
Converting images
- Select your image files in Finder
- Right-click (or Control-click)
- Pick Convert with Picmal
- Picmal opens with your files loaded. Choose a format and convert.
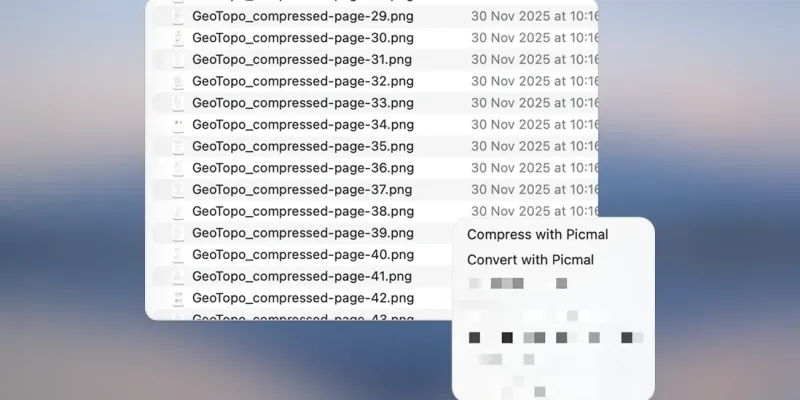
Compressing images
- Select your image files in Finder
- Right-click
- Pick Compress with Picmal
- Picmal opens in compression mode. Adjust settings and go.